Bacon Wrapped Chicken Thighs with a side of Broccoli

Last week I took the kids to the grocery store and I asked them what they wanted to eat for dinner.  They said that they wanted chicken and bacon and rice.  I told them that they had to pick a vegetable and so they chose broccoli.  When I’m cooking with the kids I like to try and have them help as much as they can.  If one is off washing dishes while the other is helping me season the dish then that works too!

For this recipe there really isn’t much to it.  It’s a very simple recipe.  You know me by now…  Bacon is my favorite flavoring!  😛


BACON WRAPPED CHICKEN THIGHS and BROCCOLI

Ingredients:

1 head of broccoli (chopped into pieces)

1 package of uncured bacon

1 pound of chicken thighs

3-4 tablespoons of Coconut oil or butter

Seasoning (salt, pepper, parsley, etc.  Whatever you like!)

Directions:

1.  Grab your pans and preheat them on the stove at medium high heat.

2.  In one pan, put the butter or oil and let it melt.

3.  Toss in the broccoli and cook til it is at the tenderness that you like.  I would say about 7-10 minutes.  (I like to season my broccoli after it’s been cooked that way I can give it a taste and if it needs more seasoning I add more.  I usually just salt and pepper it.  Sometimes for a kick I’ll add chili or cayenne powder, and sometimes even red pepper flakes.)

4.  While your broccoli is cooking, season the thighs and then wrap in bacon.  Try and make sure you have the ends of the bacon meet on the same side.

5.  Place your meat seam side down onto the pan and cook on all sides until the bacon has browned and crispied up.  This will be about 15-20 minutes of cook time.

IMG_1655

6.  When all is said and done, plate up your food all fancy and take pictures!  I mean…  serve and enjoy!

IMG_1657 IMG_1659

Grilled Tilapia

Massive craving for fish yesterday after the back workout at the gym yesterday.  PaleoJoe had defrosted chicken, which sounded great at the time, but after 45 minutes of back and then 1 mile on the treadmill I wanted something else.  TILAPIA!

So after the gym we headed to MOM’s and picked up a whole tilapia.  Again, when choosing fish make sure that the eyes are bright, the body has no cuts or bruising and still looks pretty, and it doesn’t smell.  If you don’t know what I’m talking about then ask the fish guy/gal.  They will help you pick the right one.  Also, if they offer fish cleaning services where you get your seafood then definitely take the opportunity and have them do it.  For this fish, we had them gut it, scale it and lop off the fins.  POW!  Here’s the recipe for…


GRILLED TILAPIA

Ingredients:

1 whole tilapia (cleaned)

IMG_2098

1 lemon (sliced)

IMG_2099

Handful of fresh Basil (you can keep it whole or chop it up.  Entirely up to you.  I would also recommend fresh Rosemary or Thyme.)

Salt and Pepper to taste

IMG_2101


Directions:

1.  Preheat your grill to medium high heat.  Charcoal grill should be about the same.  You don’t want high heat.  You’ll burn the fish and that’s sad.

2.  Season the inside of your fish with salt and pepper.  Place a layer of basil down and then the lemon slices and then another layer of basil over that.  I just so happened to have some lemon slices leftover so I squeezed the juice over both sides of the fish.  Season both sides of the fish with salt and pepper.

IMG_2100

3.  By now, your grill is preheated so take your fish on over and lay it on the grill.

IMG_2102

I know…  the picture is dark.  It’s a terrible picture, but you get it right?

4.  Put the cover down and LEAVE THE FISH ALONE!  You’re going to let it cook for 12-15 minutes.  When it’s time, FLIP!  Wait another 12-15 minutes and you’re done!

IMG_2106


We ate the fish with a side of fresh diced tomatoes (Lemon Boy and Early Girl) from the garden.  I put about 3 tablespoons of patis (fish sauce) and mixed it.  Sometimes I overestimate how much seasoning is on the fish and I’m left with an under seasoned fish.  Whoops!  Having the tomatoes with the patis helps.  Super tasty!  Prior to Paleo I would eat this with a side of rice, but ah well.  ENJOY!!

BBBBRRRRAAAAIIIINNNNSSSSS!


Well, PaleoJoe and I are officially zombies.  Yesterday for our post-workout meal we had pork brains with a side of our home made kimchi and watermelon juice.  I had posted last week, a picture of the different organs that we had purchased and for today’s recipe we are going to be working with the brain.

This brain was kinda weird.  As it is our first time working with this type of meat I don’t know if we handled it correctly, or if we did everything perfectly.  We looked online at various websites on how to prepare and cook the brain.  Apparently they’re not so uncommon in the southern states and will come canned with some kind of gravy.  Didn’t look very appetizing at all. Oh and tell me why I kept thinking of this guy the entire time I was looking up recipes:

v0_master

HA!!

Anyhoo…  Since it was too hot to make a stew and we didn’t have enough vegetables for a stir-fry, we ended up using seasoned coconut flour to bread it and fried it in leftover bacon fat from an earlier breakfast.  Here’s the recipe…


BREADED PORK BRAIN

Ingredients:

1lb pork brain

IMG_1985

1/4 cup of coconut flour

Seasoning (Salt, Pepper, Onion Powder, Fresh chopped basil)

IMG_1988

Bacon Fat or Oil (EVOO or Coconut Oil.  Whichever you like to cook with.  Butter will work as well.)


Directions:

1.  Soak brain in cold water for 1-2 hours.

IMG_1986 IMG_1987

2.  In a large enough pot, put the brain in with enough water to cover it and put it on the stove on high heat.  Bring it to a boil and when it does, turn the heat down to simmer.  Let simmer for 3-5 minutes.

3.  Drain water and cut to however large pieces you want.  (To be honest, I think since ours was frozen it kind of fell apart.  We didn’t have to do much cutting, but just in case yours stays together, then cut it.)

IMG_1989

4.  Preheat frying pan on medium high heat with your cooking oil/butter.

5.  I’m going to assume that you know to let your meat cool down before handling.  Carefully take your pieces of brain and roll them in the flour.

IMG_1990 IMG_1991

6.  Place pieces on the pan and cook for about 5-7 minutes, or until it’s a golden brown.  (PaleoJoe says that the pieces were soft and flimsy so he had to use a fork to carefully flip them.)

IMG_1992 IMG_1993 IMG_1994 IMG_1995

7.  Plate and SERVE!!

IMG_1997


Again, we had them with a side of our homemade kimchi and fresh watermelon juice.  (PaleoJoe tossed a couple of pieces in a blender and hit puree.)  I’m not sure if the brain is supposed to be soft, but that’s what it was.  Soft.  The breading on the outside gave it the teeniest of crunch, but the brain itself was very soft.  What did it taste like?  I don’t know if I can explain it.  It wasn’t iron-y, it didn’t taste like pork, but there definitely was a taste to it.  I just can’t quite describe it.  I’ll ask PaleoJoe and see what his take on it was.

We’re going to try another brain recipe, preferably with a fresh brain, and see if there is any difference in texture and taste.  All in all, it wasn’t a bad experience.  We tried something new, and we will definitely try it again.  ENJOY!

Grass-fed Burgers

Whenever I pick my kids up from the babysitter’s place, I always ask them: “What do you want to eat for dinner?”  I usually get the same answers: “Chicken and rice!  Top Ramen with egg!” or the super gross: “MCDONALD’S!!”  I always tell them no, and I offer up alternatives.  I remind them that I will never take them to McDonald’s because that’s not REAL food.  They are saddened by this, but then perk up when I tell that that they’re going to help me make dinner.  They are always so very willing to help out in the kitchen and I love that.

So last night I sugested burgers for dinner and to my surprise they said yes.  My kids don’t normally like hamburgers.  They are more hot dog eaters and they very rarely eat sandwiches.  My girl would prefer to eat the meat separate from the bread, and my boy would rather eat the bread than the meat.  They’re weird, but whatever.

We stopped at Lucky’s for ingredients and to my happy surprise there was uncured bacon and grass-fed ground beef there.  YES!  They of course had organic vegetables so I put that in the basket as well.  15 minutes later and we were out of there.

Since my kids aren’t really on the Paleo Lifestyle like I am, I allowed them to have buns to hold their burger.  But not just any old boring buns!!  NOPE!!  I had made my own Garlic and Parsley Butter a couple of days ago and I spread it on some french bread slices and toasted it up.  Oh we fancy!!  😛

Here’s what you’re going to need for…


BURGERS

Ingredients:

1 lb of grass-fed ground beef

3 strips of uncured bacon (diced)

3-4 cloves of garlic (minced)

1 egg

Montreal Seasoning and Onion Powder (I kind of eyeballed it.  A tablespoon total perhaps?)

Directions:

1.  Put all of your ingredients in a bowl.

IMG_1674

2.  Get your 6 year old boy to wash his hands and squish away!!

IMG_1675 IMG_1676 IMG_1677 IMG_1678 IMG_1679 IMG_1680 IMG_1681

He thought that it was the grossest thing ever, but the smile on his face shows me that he thought it was fun.

3.  If you have a grill then fire it up!  If you’re like me and don’t have one, then get a pan and put it on the stove on medium high heat.  Add about 2-3 tablespoons of butter and let it melt.

4.  So the size of the patty depends on you.  Want a 1/2 pound of burger then divide the meat into two.  Want a 1/4 pounder?  or…

cheez

HA!!  Well…  you get the picture.  Up to you!!

5.  When the pan/grill is hot, add the meat.  Let cook for 3-5 minutes on each side (or longer depending on how well you want it cooked.  I like mine rare.)

IMG_1682

6.  You can use the time that the patties are cooking to prep your fixins.  I had an avocado, a tomato, and iceburg lettuce.

IMG_1684

Now THAT’S a delicious burger if I ever saw one!!  I pretty much inhaled it.  It was juicy, flavorful, and of course Paleo friendly.  🙂

My kids enjoyed theirs as well.

IMG_1685 IMG_1686 IMG_1701 IMG_1702 IMG_1703

So again, it is entirely up to you what kind of fixins you want to add to your burger:   grilled onions or bell peppers, portobello mushroom, cheese (raw and unpasteurized if you’re Paleo), MORE BACON!  Up to you!  Make it your own.  I recommend serving this up with a side of sweet potato fries.  ENJOY!

Paleo Stir-Fry (Chicken, Shrimp and Vegetables)


I really wish I had written the recipe down or had typed up this entry the day after I had made this dish.  I am going to try my best to redo the recipe based on the pictures that I took.  PaleoJoe and I had made this dish on Wednesday last week and it only took about 30 minutes to make.  Since I didn’t write down the recipe all of the measurements will be guesstimates so please use the minimum amount of seasoning and then add more at the end when everything has been cooked.  The noodles used in the dish were made from Sweet Potatoes.  So yes, this is Paleo friendly.  I haven’t had these noodles before, just the shirataki, but these were great!


PALEO STIR-FRY

Ingredients:

1 bag of sweet potato noodles (You can find them at your local Asian market.  Shirataki or Konjac Noodles will work just as well.  Just make sure there’s no tofu or sugar added if you are Paleo Friendly.)

IMG_1437  IMG_1438

1 lb. Shrimp (Peeled and De-veined)

1 lb. of chicken breast (cut into large chunks.  Try to make them all the same size so that they cook evenly)

IMG_1440

1 chinese egg plant (cut into chunks)

IMG_1443

1 small onion (cut into chunks)

2-3 stalks of green onion (diced)

2-3 cloves of garlic (minced)

1 carrot (peeled and shredded)

IMG_1442

5-6 large shiitake mushrooms (sliced)

IMG_1441

2-3 handfuls of mung bean sprouts

IMG_1446

2 sweet gypsy peppers (I had them leftover from my FullCircle box and I didn’t want them to go bad.  Gave it a nice kick.  Optional.)

Seasoning (Tamari or Soy Sauce, salt, pepper, powdered/fresh ginger, white vinegar, Mirin, or even sesame seeds.  Entirely up to you what you want to put in it.  If this is your frist stir-fry then go with the first 3 ingredients.)


Directions:

1.  Get a large pan or pot and soak your noodles.  Put on stove and bring water to boil.  Turn down heat so that the water is simmering.

IMG_1439

2.  If your veggies aren’t prepped yet, then please get to preppin’!  Otherwise, get a wok and preheat it to medium high heat with coconut oil.

3.  Put eggplant and onion.  Cook for 5 minutes.

IMG_1444

4.  Add peppers.

IMG_1445


5.  Add chicken and cook 5-7 minutes.

IMG_1447


8.  Add the rest of the vegetables except the mushrooms.  Cook 3-5 minutes.

IMG_1448


9.  Add shrimp and cook until they are pink.  About 5-7 minutes.

IMG_1449 IMG_1450


10.  Add mushrooms and cook for about 3 minutes.

IMG_1451


11.  Check your noodles.  They should be soft.  Taste one.  Should be similar to spaghetti where it’s flexible, soft, but not mushy.  Get a colander and put it in your sink.  Take your noodle pot to sink, and dump noodles into colander so that the water will drain.  You can also take tongs and transfer the noodles from the pot to the wok if that’s easier for you.

IMG_1453

12.  Mix noodles and veggies.  Season your dish with salt, pepper, etc.  Taste and if you think it needs more then add some more.

IMG_1456 IMG_1457


13.  Transfer food to a dish and ENJOY!

IMG_1460

You can easily make this a vegetarian or even vegan dish by opting  out of the chicken and shrimp.  You can also put in any number of vegetables into this dish.  Perhaps some baby bok choy, zucchini strips, etc.  Have fun with it!  Experiment.  Recipes aren’t set in stone.  They’re more like guidelines.  Make it your own.  🙂

Pork Heart

I am very excited about the upcoming dishes.  Last week I picked up a bunch of different organs at my local market.  Not the mainstream market of course, but a market nonetheless.  As you can see from the picture I have a bunch of different organs to experiment with.

IMG_1362

I feel like a mad scientist when I say that.  😛

I am especially excited about the brain which is on the bottom left.

hannibal_lecter_fava_beans_and_a_nice_chianti

HA!  I couldn’t help myself.  I really couldn’t!

So for this dish, I prepared the pork heart.  I guess you can call it a stir-fry, but you can easily turn it into a stew if you had a couple of hours and a crock-pot.   More on that later.


PORK HEART STIR-FRY

Ingredients:

2 pig hearts (About 1.5 to 2 pounds. Trimmed of nerves, sinew, and cut into large cubes.)

IMG_1649

1 carrot (peeled and diced)

1/2 small onion (diced)

2 strips of bacon (diced)

2-3 cloves of garlic (minced)

1 large tomato (I used an heirloom tomato and diced it up)

Salt and Pepper

2-3 tablespoons of butter

Directions:

1.  Heat up your skillet/frying pan on medium-medium high heat and add bacon.  Cook bacon for about 3 minutes and add all veggies but the tomato.  Cook for another 5 minutes.

IMG_1648

2.  Add tomato and stir.  Season with salt and pepper and turn heat to low.  Cook for another 5 minutes.

IMG_1651

I know, I didn’t quote finish dicing up the tomatoes in this pic, but you get the idea.

3.  In another pan, heat on medium high and add heart and butter.  Saute’ until golden brown on the outside and slightly pink in the middle.  You want it to be medium rare.  If you overcook it, it will be tough and kind of rubbery.

IMG_1650

4.  Once everything is cooked, serve it in a dish and ENJOY!

IMG_1653


I’m sure if you dice up the heart and cook it in a crock pot for a couple of hours it will come out just as delicious.  Just make the sauce separate since it’ll only take about 10-15 minutes to make.  Last minute I added fresh basil and it was delicious.  You can also opt out of cooking the tomatoes and just leaving them fresh for added flavor and texture.

Paleo Spaghetti

This would be the second time that I’ve made this spaghetti.  I don’t remember exactly where I had found out about spaghetti squash, but when I had bought it the first time I thought it was super cool.  This dish is Paleo friendly, it satisfies the craving for this comfort food, and it’s pretty filling.

This past weekend I had made a Stuffed Portobello Mushroom, and I had saved half of the meat mixture for the spaghetti sauce.  So if you follow me and the pictures look a little familiar then that’s where you know it from.  The only difference is that I moved the meat from a skillet to a sauce pot and added tomatoes.  The sauce, once it simmered for an hour or two was stored in the fridge for about two days.  A couple reasons why I did that:

1.  It was getting pretty late by the time we had finished cooking the last of our food for our weekly meal prep.

2.  I forgot to prepare the squash.

3.  Letting the sauce sit overnight or even two days will enhance the flavor.  The sitting period marries all of the herbs and spices and brings them together.  Making the sauce more flavorful and delicious.  Try it!

Anyhoo, making the sauce and baking the squash is very very easy.  If you prefer even more quick and easy recipe, or perhaps you want to go the vegetarian route you can opt out of the meat.  You can go even quicker by just purchasing a jar of pre-made spaghetti sauce at your local grocery store.  But where’s the fun in that?

What I didn’t get a chance to do was add more vegetables to the sauce.  Whenever I make spaghetti for my kids I like to shred up carrots and zucchini and add it to the sauce.  I’ll even add bell peppers and mushrooms if I have it on hand.  I always feel like the kids don’t eat nearly enough vegetables, and so if you can sneak in the veggies without them knowing AWESOME!  The carrots will add a little sweetness to the sauce, and being Filipino I like it a little sweet.  Growing up, whenever my Mom made spaghetti she always added a handful or two of sugar at the end.  Shredded carrots are much healthier for you than sugar.

On with the recipe!  I’m going to write it as if I were making it my usual way.  So everything will be cooked in a large sauce pan (just ignore that skillet in the pictures) and I’m going to add the extra vegetables, but those are optional just like the meat.  Just read the recipe first, take out what you don’t like and put in what you like.  Recipes are like guidelines anyway.  Except when you’re baking.  😛  Most measurements are guesstimates as I don’t really measure when I cook.  I kind of just throw it in there.  So please season your dish a little bit and once it’s complete you can add more to your liking.  You know what you like anyway.


PALEO SPAGHETTI

Ingredients:

1/2 pound of grass fed ground beef

1/2 pound of ground Italian sausage

1/2 onion, diced

2 slices (or more!!) of bacon, diced

IMG_1330  IMG_1331

1-2 tablespoons of minced garlic

1 – 15 oz. can of organic tomato sauce

1 – 15 oz. can of organic diced tomatoes

1 – 6 or 8 oz can of organic tomato paste.

IMG_1356

** Veggies (If you want to sneak veggies into your sauce for the kiddos, or just so you can have more veggies in your diet I would recommend shredded carrots, shredded or chopped zucchini, sliced mushrooms, diced bell peppers, black olives, etc.  Amounts will vary depending on how much sauce you are making.)

** Grated parmesan cheese (I like to add about 3-4 handfuls of parmesan cheese into my sauce while it’s cooking.  Also tasty after it’s all cooked.)

**  Fresh Basil, Oregano and Italian Parsley (If you have some on hand then grab a small handful of each, chop it up finely and add it to the sauce.  I know that the sausage should have some of those herbs in it, but it can’t hurt to add more!  Oh and if you have dry then add about 2-3 tsp of each.  Then add more, after you’ve tasted the sauce, to your liking.  Another thing about dried herbs and spices, they have a shelf life of about 2 years if it’s not already printed on the container.)

Salt and pepper to taste

1 – spaghetti squash (weight will vary depending on how much spaghetti you want to make.)

IMG_1418

Directions:

1.  Preheat oven to 375 F.

2.  Cut your spaghetti squash in half.

IMG_1419

3.  See those seeds?  Scrape them out.

IMG_1420

4.  Oil up a baking sheet with EVOO or coconut oil or butter, whatever you like, and place the squash cut side down.

IMG_1421

5.  Pop it into the oven and let cook for 45 minutes.  Stab it with a fork and if it goes in easy then it’s cooked.  If not, add another 10-15 mins and check again.

6.  While the squash is baking, take a large sauce pot and heat it on medium high heat.  Add ground beef.  Let it cook for about 5 minutes.

IMG_1324 IMG_1325

7.  Add sausage and cook for 5 minutes.  Don’t forget to stir!

IMG_1326

8.  Add diced bacon and cook another 5 minutes.

IMG_1332

9.  Add veggies and cook for yet another 5 minutes.

IMG_1334 IMG_1335

10.  Add tomatoes, herbs, and cheese.  Stir and when it comes to a boil, turn the heat to low and let it simmer.  Stir it every now and again just to make sure the bottom doesn’t burn.

IMG_1357

11.  Squash is done I hope.  Take it out of the oven.

IMG_1422

12.  When the squash isn’t too hot to handle, use a spoon or a fork to scrape out the spaghetti.

IMG_1423

13.  Top it with your sauce and ENJOY!!

IMG_1425 IMG_1427

Grilled Rock Cod and Roasted Vegetables

IMG_1390

Here’s lookin’ at you kid…

What started out as a quick run to the store for coconut water ended with a plethora of delicious fruit, a stock up of miscellaneous new organs to try, and a whole rock cod.  When I go to the grocery store, I usually have a list in mind.  I don’t grab a shopping cart because I know that if I do, I will add things to the cart that I didn’t necessarily need at the time, but what an awesome deal!  I didn’t mean to get all that stuff yesterday, but when I saw that there was jack fruit for sale I was a goner.  I’ll make a post on jack fruit tomorrow.  I plan on cutting it open tonight.

Anyhoo, in the back of the store is a fish department where they have all kinds of fresh wild caught or farm raised fish.  What I love about going to stores like the one from last night, is that they have no problem cleaning and/or cooking the fish for you while you go about your business and finish shopping.  I didn’t get the fish cooked at the store because they use some kind of vegetable or canola oil and that’s not very Paleo friendly.

When choosing fish you want to make sure that it’s as fresh as possible.  You can ask the guy behind the counter (if it’s not too busy) and they are more than willing to help you out.  If the guy/gal looks busy then try this:

1.  The eye of the fish needs to be clear.  The clearer the eye, the fresher the fish.  If it’s cloudy or dull, it’s still okay to eat, but again…  fresher is better.

2.  How does the fish look?  Is it shiny?  Does it look clean?  They say not to judge a book by its cover, but in this case pick the prettiest looking one.

3.  Smell.  Does it smell like fish?  It shouldn’t.  Freshwater fish shouldn’t smell at all and if you’re buying one that’s from the ocean then they should smell a little briny.  If it stinks, don’t buy it.  If you buy it anyway and you cook it, it’s still gonna be stinky, and now your home will smell even more.

If you’re unsure then ask the guy/gal behind the counter and they should help you out no problem.

The fish that I picked last night was a beast!  Frickin’ HUGE!!  I would say about 2 feet long and weighed in at about 4 pounds.  Thank goodness PaleoJoe likes fish, because I like fish too and I had lived with someone that didn’t like it and so I didn’t get to have many fish dishes.  I’m Asian…  I needs seafood!  We had the guy scale, clean, and butterfly it.  PaleoJoe’s Mom doesn’t like the smell of fish and so to keep her happy we grilled it outside on the gas grill.  You can cook it over coals or wood if you have that kind of grill.  As a side dish we went with a random mix of vegetables:  Asparagus (grilled), Onions, Zucchini and Yams (Roasted).  The recipe is as follows:


GRILLED ROCK COD WITH ROASTED VEGETABLES

Ingredients:

1 whole rock cod About 4 pounds, gutted and scaled  **See note at bottom of page.

IMG_1370

1/4 to 1/2 cup of melted butter (we use raw unpasteurized butter)

1 small lemon (You’re going to squeeze the juice out.)

2 tblsp of minced garlic

1 tblsp of freshly minced basil

Mixed vegetables (You’re going to throw them in the oven to roast while you prep the marinade so pull what you like.)

2-3 tblsp of extra virgin olive oil/coconut oil/butter (entirely up to you what you want to use.  I used EVOO)

Salt and Pepper


Directions:

1.  Preheat oven to 400 F.

2.  Oil your baking sheet.

3.  Prep your veggies and arrange on baking sheet.  Season your veggies with salt and pepper.  As much or as little as you like.

IMG_1373

4.  Pop that tray in the oven and leave it in there to cook.  Should be about 20-30 minutes or until your veggies are at the desired tenderness.

5.  Preheat your grill to high.

6.  Unwrap your fish and if the wrapper is large enough to accommodate the fish then cool!  If not, place it on a baking sheet or some kind of tray.  Hopefully you got it butterflied.  You’re going to have it skin side up.

IMG_1380

7.  Grab a bowl and melt your butter.

IMG_1372

8.  Add garlic.

IMG_1374

9.  Add basil.

IMG_1375

10.  Add lemon juice. and mix!

IMG_1378 IMG_1379

11.  Use a pastry brush to spread the butter all over the fish.  Make sure you save some for the other side.  You will spread it on while it’s on the grill.

IMG_1381 IMG_1382

12.  Season your fish with salt and pepper.

IMG_1383 IMG_1384

13.  Let your fish sit in the marinade for a bit.  While you’re waiting wash your asparagus, drizzle some olive oil, and season with salt and pepper.

IMG_1387

14.  Throw those stalks on the grill for 3-5 minutes or until desired tenderness.

IMG_1389

15.  You may now proceed to cook your fish.

IMG_1391

16.  Place the fish on the grill skin side down.

IMG_1392 IMG_1393

17.  Brush the marinade on the other side of the fish and then season it.

IMG_1394 IMG_1395

18.  Leave it on to cook for 8-10 minutes.  Flip!

IMG_1396

I do not condone flipping the fish by hand because you might get burned, but since the Mr. did in this picture I have to type a warning/disclaimer.  Please use tongs or a spatula.

19.  Let the fish cook another 8-10 minutes on this side.  Please note that temperatures will vary.  Your fish is done cooking when the meat can be a easily flaked when pushed with a fork.  If it doesn’t do that then cook it longer.


IMG_1397 IMG_1398

20.  By now, everything has finished cooking at the same time (well except for maybe the asparagus since it was cooked rather quickly on the grill).  Dig in and ENJOY!!

IMG_1403

**If you want to get a smaller fish you can.  It just won’t take as long to cook.  I would say 3-5 minutes.  Again, just prick it with a fork and if the meat is easily flaked then it’s done cooking.  If not, add more cook time.

Stuffed Portobello Mushrooms

Always trying to be creative with our food.  You can easily get bored if you’re always cooking the same thing every day and night.  Change things up a bit.  Do some research on the internet and see if there’s a dish out there that you haven’t tried yet, it sounds interesting, and just go for it.  If it comes out terrible, then you know that that particular dish just isn’t for you.  If it comes out amazing then SCORE!  Add that recipe to your book and see if you can improve upon it.

For dinner yesterday, PaleoJoe and I made Stuffed Portobello Mushrooms.  We had some grass fed ground beef in the freezer and rather than making a meatloaf or a burger, we wanted to try something new.  I got my google on and found this recipe:  http://www.paleofood.com/beefgrd.htm#blindogsstuffedmushrooms

It sounded amazing, but we didn’t have all of the ingredients, so this is our adaptation of the above recipe.

STUFFED PORTOBELLO MUSHROOMS

Ingredients:

4 large portobello mushrooms

Olive oil

1 pound grass fed ground beef

1 pound German Bratwurst Pork Sausage (or any sausage you so choose. we had the butcher take it out of the casing.)

2 slices of bacon (diced)

2-3 tablespoons of minced garlic

1/2 onion – diced

Mixed veggies (We had a small container of mixed diced veggies that I had cut up for when we make pizza. There was green onions, bell peppers, white mushrooms and black olives)

1/2 cup of shredded cheese (There was Mozzarella and Mild Cheddar)

3-4 tablespoons of shredded parmesan cheese

 IMG_1320

Directions:

1. Grab a skillet and put about 2 tablespoons of olive oil and turn the heat to medium high. Once preheated, add ground beef and cook for 5 minutes.
IMG_1321  IMG_1323 IMG_1324 IMG_1325
2. Add sausage and cook for 5 minutes.
IMG_1326  IMG_1328
3. If your bacon isn’t sliced and diced up already then take the time to do it while you’re waiting for your meat to cook.
IMG_1330  IMG_1331
4. Add the bacon to the skillet and cook for 5 minutes:
IMG_1332
5. Wash your mushrooms and snap off the stem. Let them sit on a plate/colander to dry.
IMG_1333
6. Add veggies and cook for 5-7 minutes.
IMG_1334  IMG_1335
7. While your meat stuffing is cooking, the mushrooms should be pretty dry. Rub olive oil onto your mushrooms. Season with salt and pepper.
IMG_1336
8. By now, everything should be cooked. Using a slotted spoon, scoop the stuffing into a bowl. Make sure you let that grease drip off before putting into the bowl. Use this time for the stuffing to cool down to preheat your BBQ
9. Your stuffing should be cooled down a bit. Add the cheese and mix. The cheese will bind the meat stuffing together so that if your mushroom should fall over (hopefully that won’t happen) you can easily put it back together with little or no mess.
IMG_1337  IMG_1338
10. Evenly distribute the stuffing between the 4 mushrooms.
IMG_1339

11. Hopefully, your grill is ready. Place the mushrooms on the grill (please ignore the tri-tip in the picture. We were killing two birds with one stone and meal prepping since the BBQ was going.) Place cover on the grill and let cook for 5-10 minutes.
IMG_1340  IMG_1341 IMG_1342 IMG_1346 IMG_1349
12. When cook time is complete, carefully take the mushrooms off the grill, serve and ENJOY!!
IMG_1351

Lengua… Tongue… Cow/Beef Tongue…

Lengua.  Tongue.  It is the scariest looking piece of meat that I have encountered in person.  It’s intimidating to think that I could cook something like this and make it edible.  I had first heard about lengua when I was in high school.  I found out that there is more to Mexican food than Taco Bell, and was introduced to an amazing place called a Taqueria.  What is this magical place filled with delicious smells?  I had no idea.  Again, Taco Bell was the only place I had heard of that was serving “Mexican” food and I seriously thought that the tacos and burritos there were delicious.  Boy was I WRONG.

I started with a simple taco with beef (or perhaps it was chicken?) and I was forever changed.  I was now a Mexican food snob and would never (unless I was drunk) step foot inside another taco bell ever again.  THIS was real Mexican food.  There were other things on the menu, most in Spanish, that I had no idea what they were, but would eventually try as the years passed.

Let’s fast forward to the Spring of 2012.  I still hadn’t tried lengua.  I knew what it was because I took Spanish in high school, but the thought of eating tongue?!  Really?!  I had no idea what it tasted like, and if I had asked the person behind the counter their opinion they were gonna say, “It’s good!”  OF COURSE they’re going to say that!!  So I didn’t try.  I finally gave it a go and WOW!  Tender and moist and full of flavor!  To be honest, you don’t see the tongue hanging from the window like a duck on a hook.  It’s chopped up into bite-size pieces and placed neatly on a corn tortilla, or wrapped up lovingly with beans and rice and other such nonsense.  If no one told you what it was, you would think it was beef.  Technically it IS beef, but you get what I mean.

Fast forward to today and this would be the second time that I have made lengua.  Please note that it takes about 2-3 hours to cook so if you are planning on having this for dinner, I suggest you either crock pot it in the morning or start dinner prep early.  I haven’t tried tongue when it has been under cooked so I can’t tell you what it tastes like.  Chewy perhaps?  All I know is that a slow fully cooked tongue is tender.  It also takes on the flavor of your sauce or spices.  DEE-LISH!!  Can I also say, that this entire meal was about $10 total and can feed about 4 people.  Just sayin’… So here is my recipe for:


LENGUA/TONGUE IN A ROASTED PEPPER SAUCE

Can be turned into a stew or a lettuce wrap.  See pics below.

Ingredients for Lengua:

1 – 2 pounds of tongue

4 whole garlic cloves (Smash em!)

1 medium onion (cut into 1/8’s)

1-2 tsp of whole black peppercorns

Beef Boullion or Beef Stock

Optional:  Add a bay leaf.  I didn’t have any on hand, but it just gives it that much more flavor.

image[1]  image

Ingredients for Roasted Pepper Sauce:

2 – Poblano Peppers

3 – Gypsy Sweet Peppers

4 – Garlic Cloves (minced)

1 large onion (cut into 1/8’s)

1 can of diced organic fire roasted tomatoes

Seasoning (Please see pictured.  Use whatever seasoning that you like.)

Optional:  Want a hotter sauce?  How about some fresh jalapenos?  Habaneros?  Ghost Chili?  I’m not that adventurous with spicy foods, but if you are then have at it!  I read somewhere that spicy foods boost your metabolism.  🙂

image[1] (2) image[2] (2)

Directions:

1.  I threw my peppers into the toaster oven at 350 F.  No preheating, just threw em in there.  Keep an eye on them and don’t forget to turn them every so often.

image[3] (2)

2.  Take your tongue out of the package and give it a good rinse.  Then put it in a pot large enough to fit the tongue as well as cover it completely in water/beef stock.  Add all lengua ingredients to the pot.  BTW…  I used 5 cups of water, so I used 5 tsp. of the beef boullion.

image[3] image[2] image[4] image[5]

3.  Place the pot on the stove, place lid, turn it to high heat, and let it come to a boil.

image[6] image (2)

4.  Once it’s boiling, turn the heat down until it simmers and then leave it alone for 2-3 hours.

5.  Sauce!  Preheat your sauce pan on medium to medium high heat with some coconut oil.  Once at temperature, add onions and cook about 5 minutes.

image[4] (2)

6.  Add garlic and fire roasted tomatoes.

image[5] (2)

7.  Hopefully by now the peppers are done.  If not, turn the heat to broil and again…  keep an eye on them.  About 3-5 minutes.  Take em out!

image[6] (2)

8.  Carefully peel the peppers and seed them.

image (3) image[1] (3)

9.  Now you can cut them into strips or you can dice them up.  Entirely up to you how big you want the pepper pieces.  I cut strips and then added them to the tomatoes.

image[2] (3)

10.  Mix everything together, and add seasoning.  Turn heat to low and let it simmer for a bit.

11.  Time elapses and your tongue is cooked!!

image[4] (3)

12.  Carefully take the tongue out of the pot and place on cutting board to cool down.

13.  I like to take the water from the tongue pot and pour some into the sauce pot.  Ah flavor…

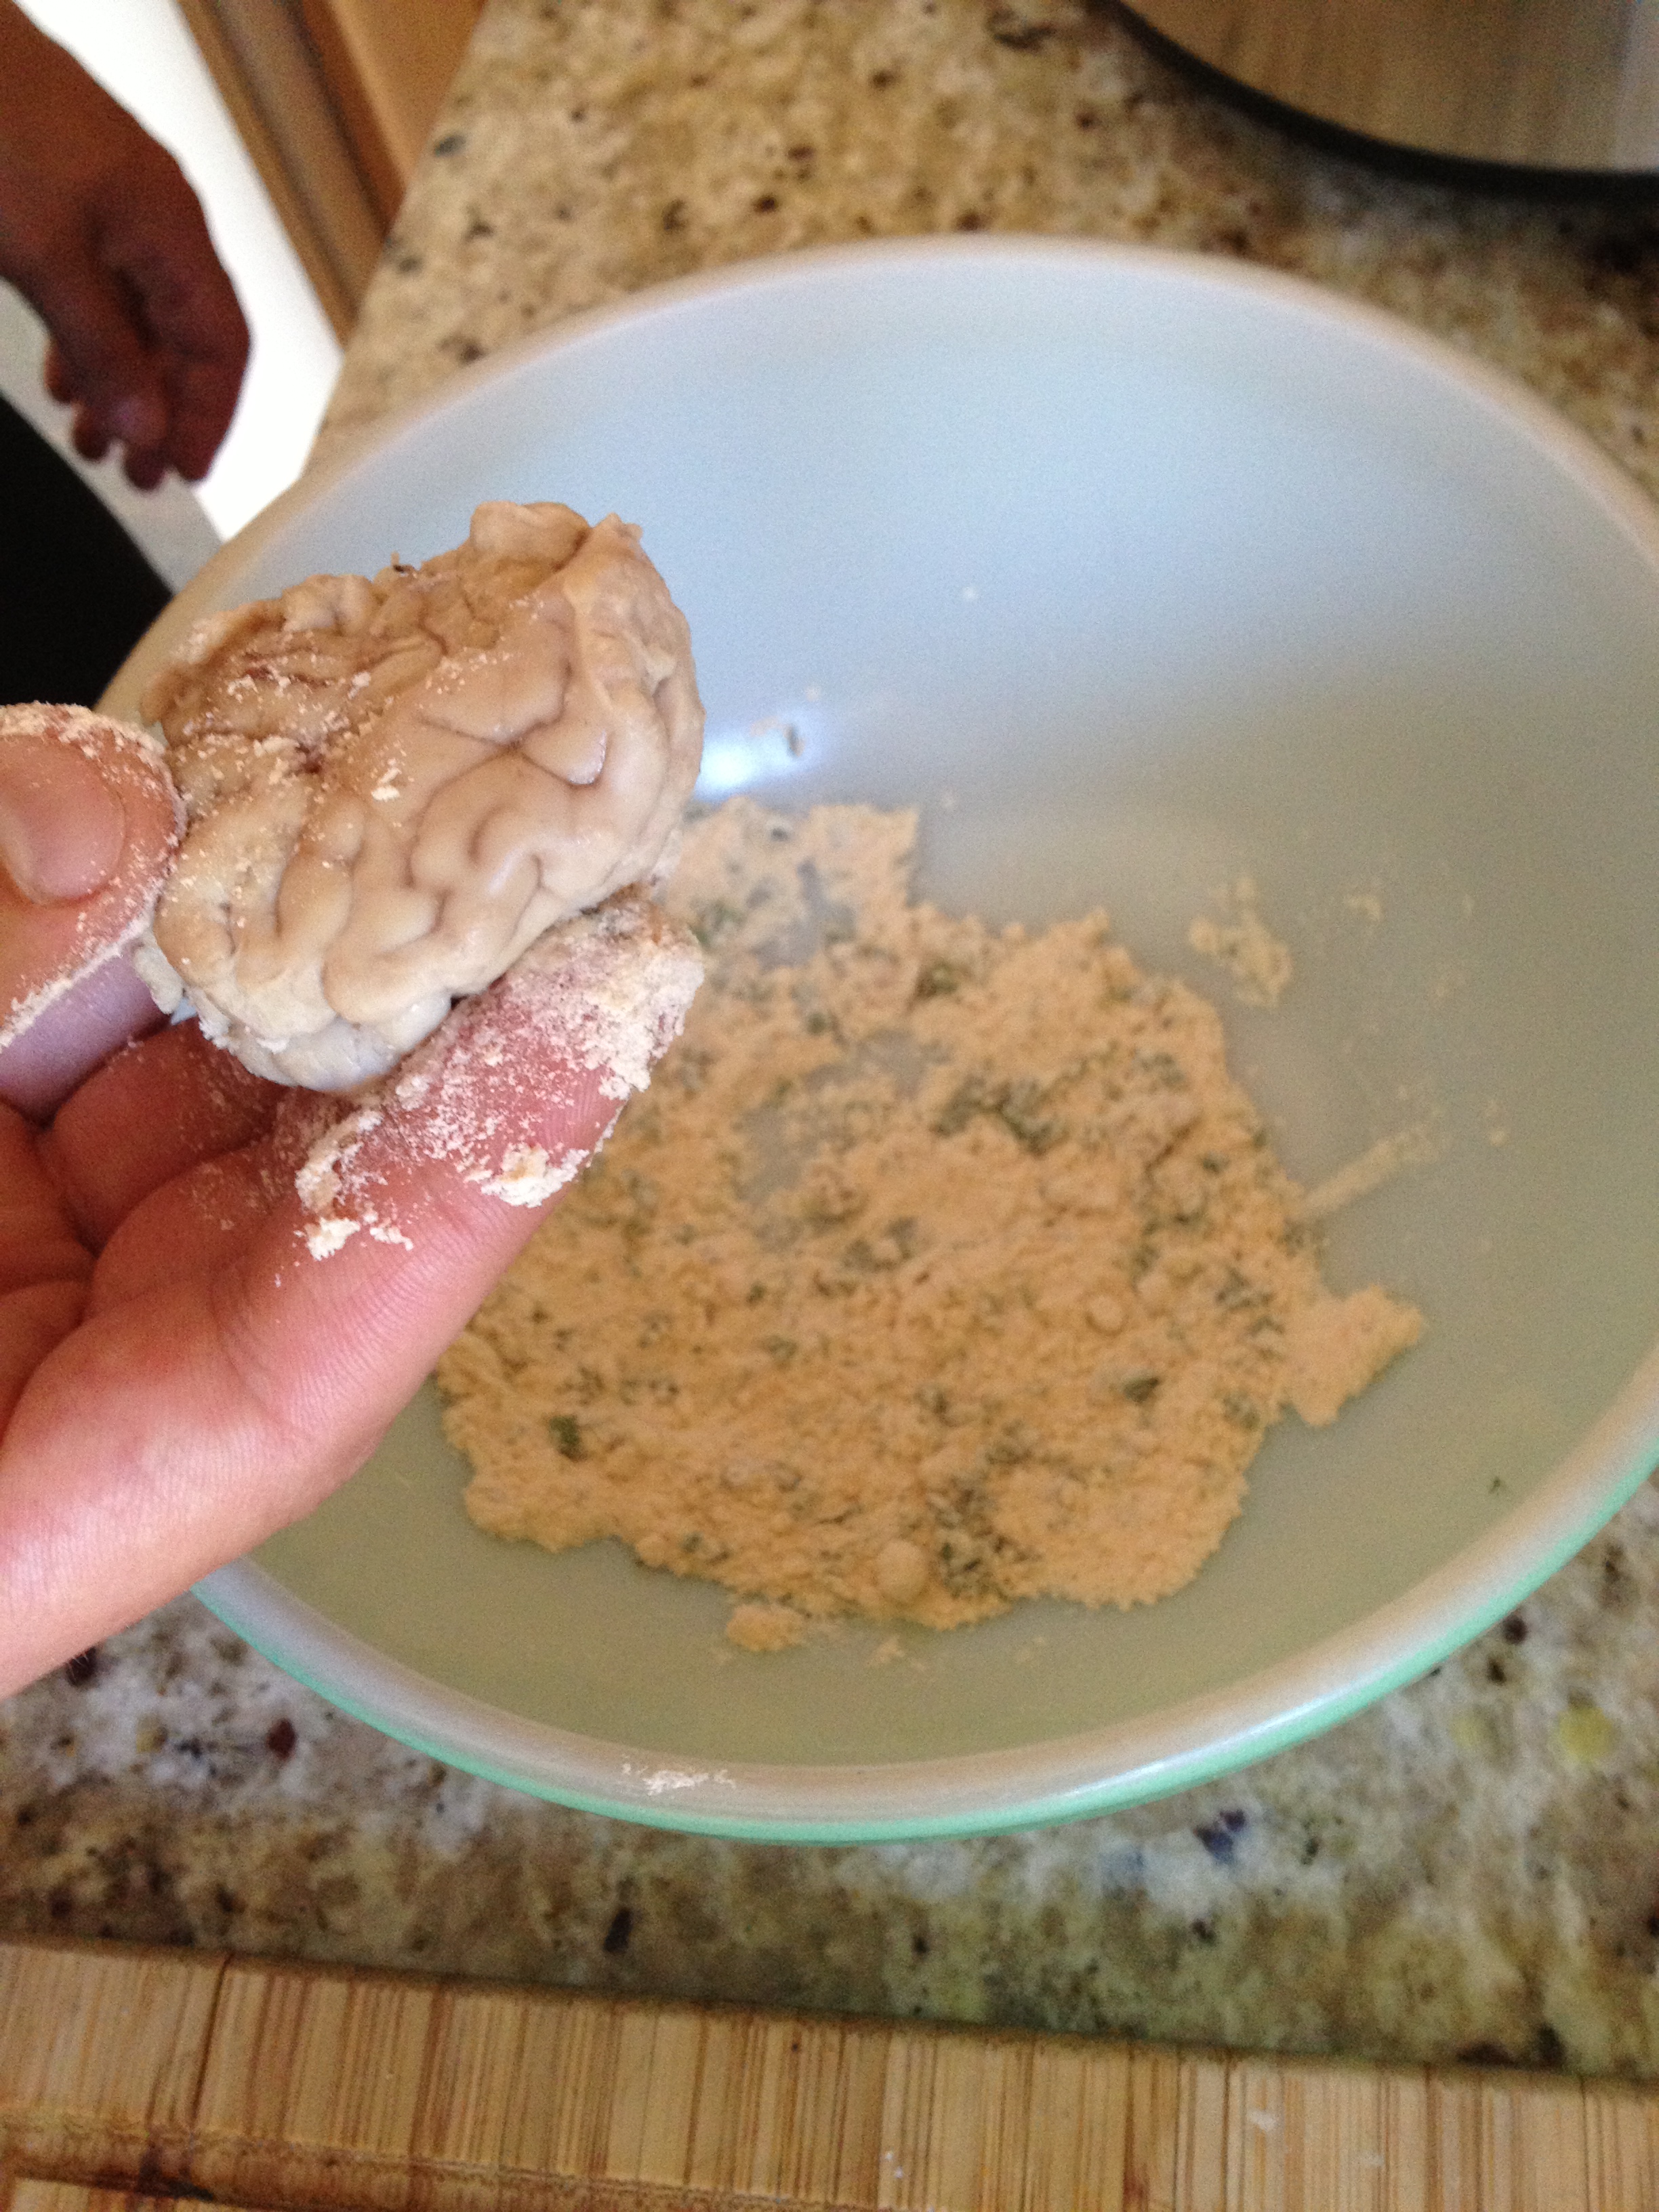
14.  Once your tongue has cooled down enough for you to touch, you’re going to have to peel it.  Please see pictures.  Note:  The longer you cook the tongue, the easier it is to peel.

image[5] (3) image (4)


15.  Now that your tongue is peeled you can slice it up however you like.

image[1] (4) image[2] (4)

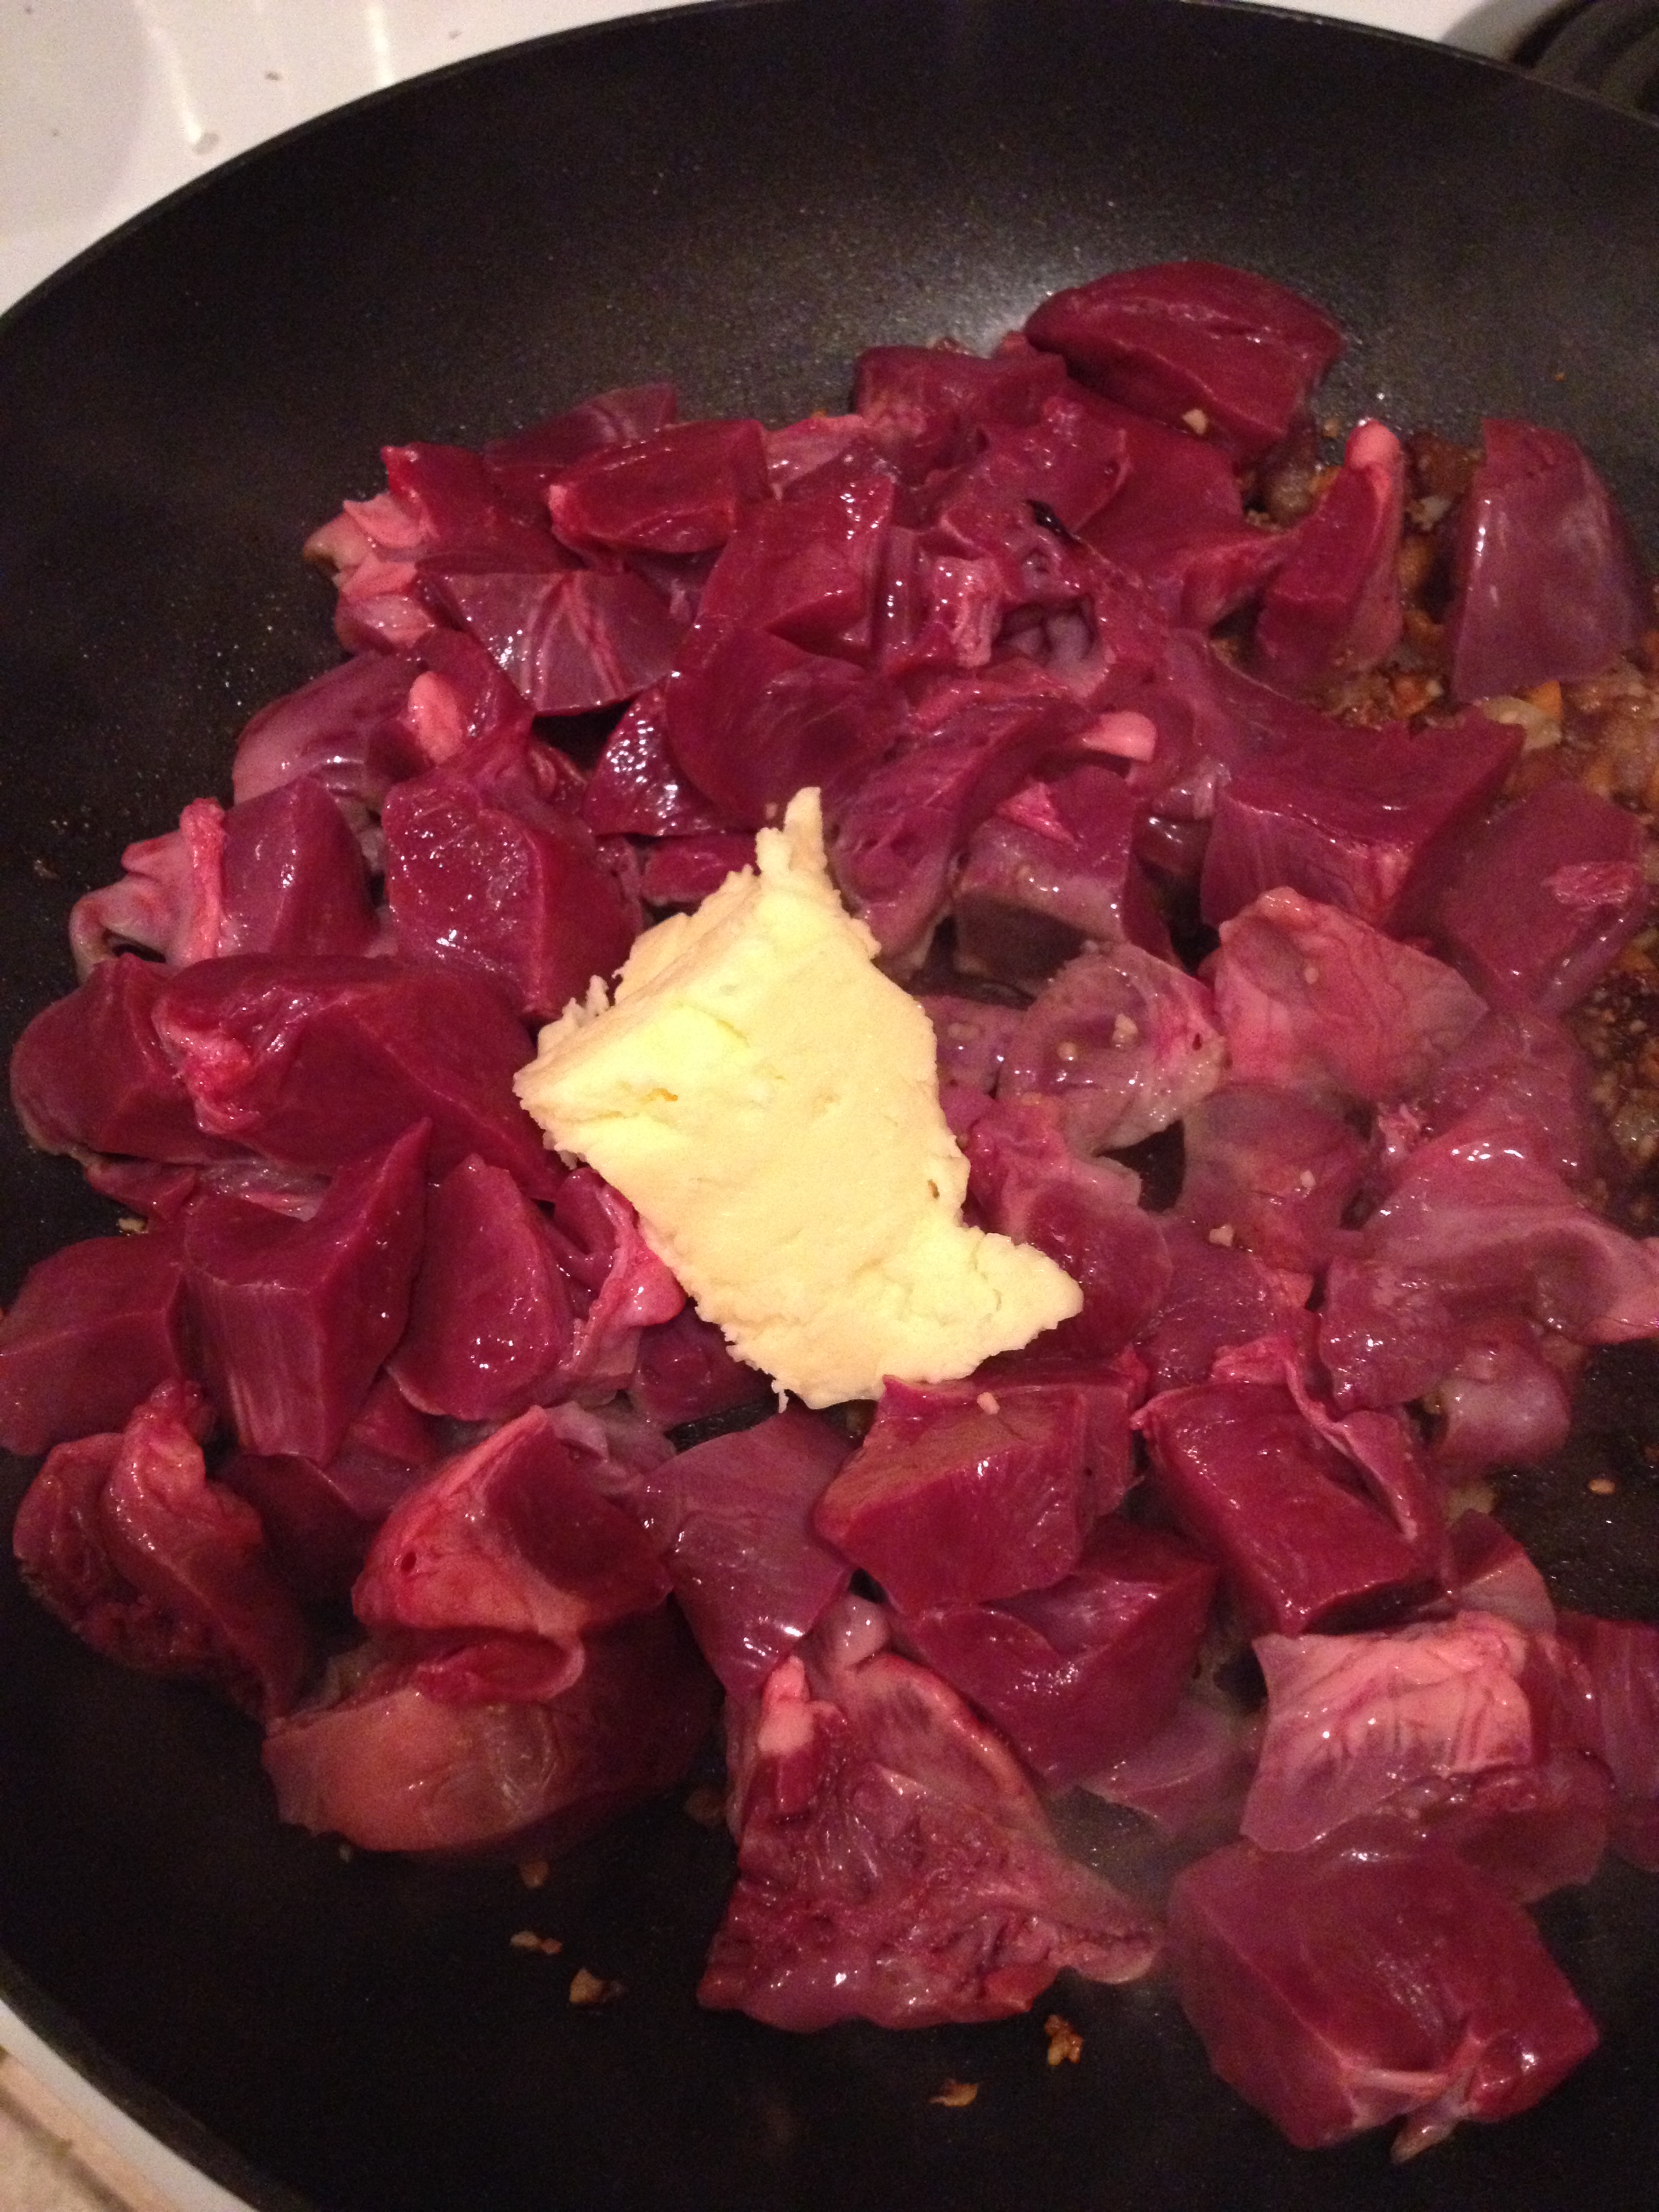
16.  I cut it into large chunks and then added the meat to the sauce.

image[3] (4) image[4] (4)

17.   You can either add more water from the pot that you cooked the tongue in to make it a stew:

image[5] (4)

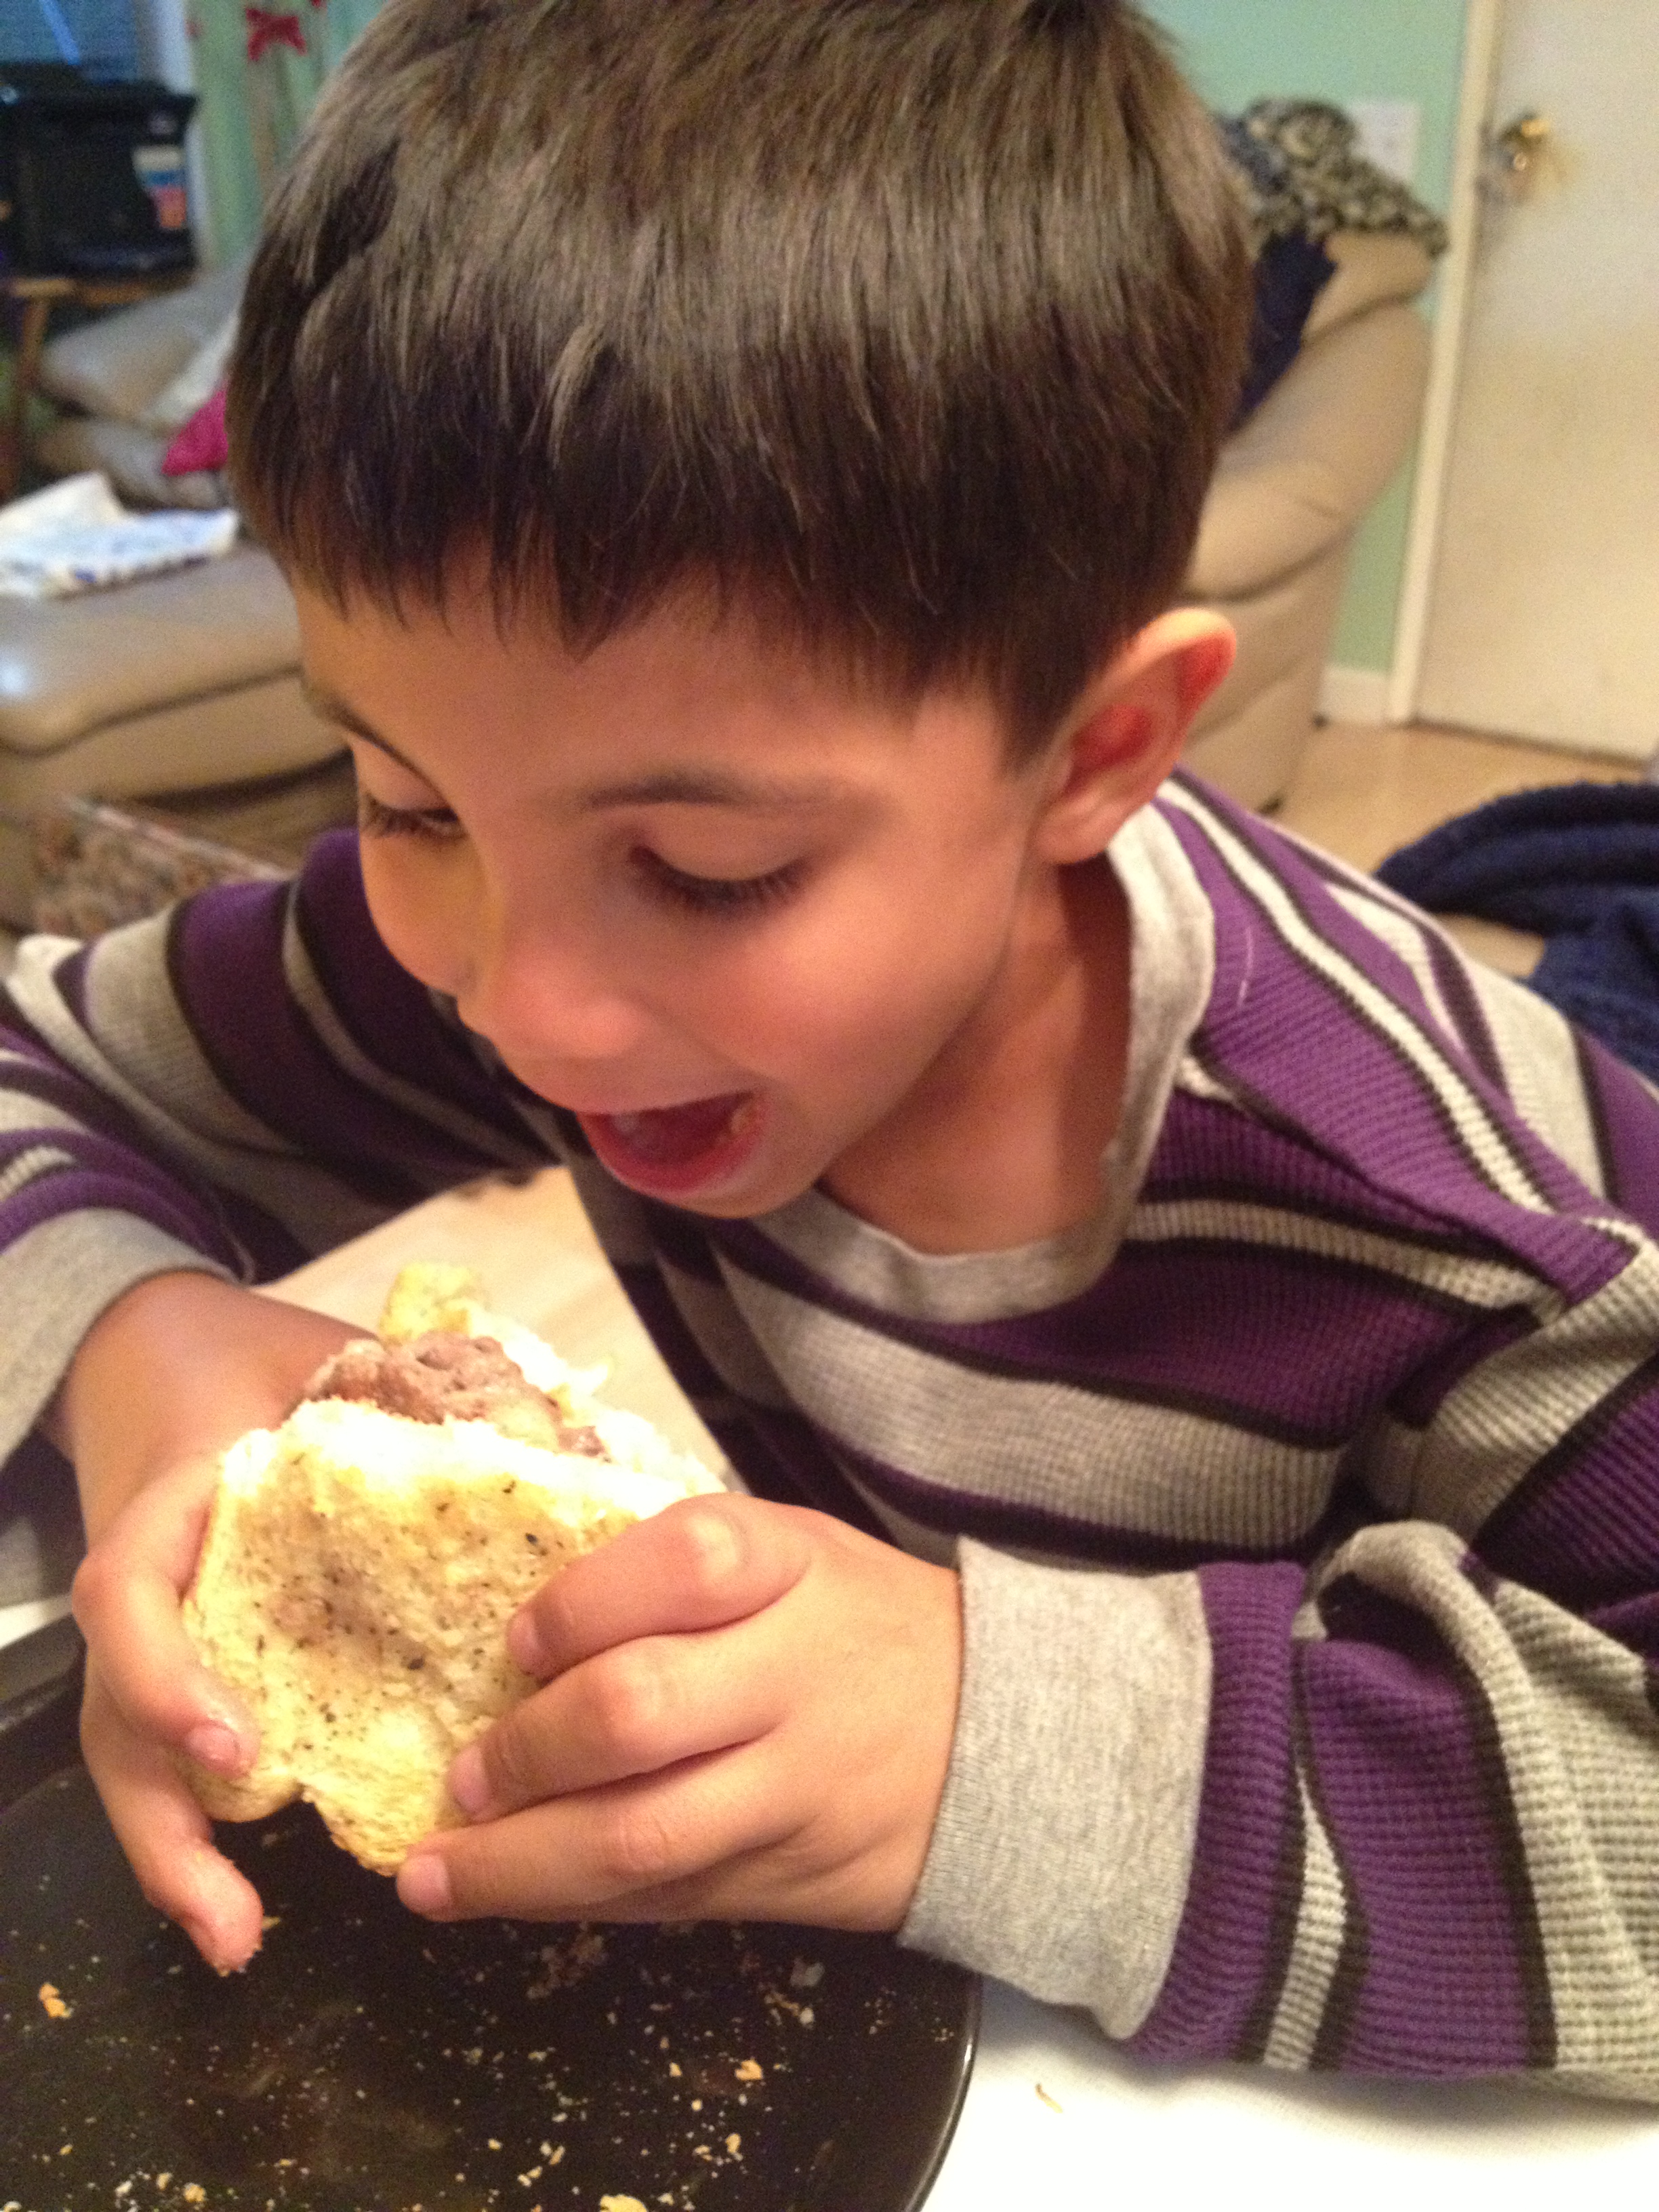
Or you can serve it on a lettuce leaf, chop up some fresh cilantro, and now you have a Lengua Lettuce Wrap!

image[6] (3)


It is optional if you want to add the meat pieces to the sauce.  You can always add it later especially if it’s super spicy and the person that you’re sharing with, if you’re sharing, isn’t all that into spicy food.  Entirely up to you.  If you have any questions let me know.  ENJOY!!